Thursday, August 30, 2012

chaise lounge make-over


Internet:  "Challenge!!!"
Me:  "Accepted!!!"
-----
In a moment of web-surfing fun, I came across a very interesting blog. 
The most talented blogess had a problem, worked to find a solution, and succeeded magnificently!
I will let Kristy Swain of Hyphen Interiors tell her story...  but as a quick synopsis: she PAINTED an upholstered chair to gain the look she desired when other options were not viable!! 

Me: "WHAT?!  You can PAINT upholstery??!!"
Hyphen Interiors: "Yep, no problem!"
Me: "I gotta try that!!!"
So off I went on a round of the local resale stores.
Found it.
A chaise lounge with nice lines that would make a great reading chair... let alone a wonderful guinea pig for my experiment.
upholstered chaise before redo by everdayartdesign
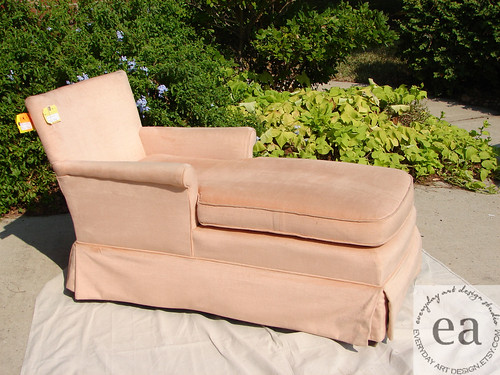
upholstered chaise before redo, a photo by everdayartdesign on Flickr.
Hyphen Interiors has a wonderful tutorial on the steps she took to paint her chair.  You can find it here.
I followed her steps and it worked beautifully.  I used more Textile Medium than she did, but that was the only varient.
So my finished product: A lovely dove grey paint, gloss white legs, and a ruffley brown trim.


another shot:

Yay, Hyphen Interiors for thinking outside the box!...  One of my favorite things to do!
everyday art design studio's painted upholstery make-over

Wednesday, August 29, 2012

let there be light....

Doing some "updating" in the homestead...

Anything that resembles "builder brass" is leaving.  Starting with the light fixtures...

I don't feel the need to show you the original fixtures.  I am just DONE looking at them, wouldn't want to inflict them on you. 

The Brass and Glass hexagonal entry hall lantern replaced with a DIY fixture:

new entry hall ceiling fixture

This fixture started as an large iron and glass candle holder (like a hurricane).  I found it at the local Habitat ReStore.  I took the brass fixture down, took it apart, and spray painted the candleabra and canopy parts flat black.  I turned the candle holder upside down, sprayed the inside of the clear glass panels with Krylon's Looking Glass spray paint, drilled a hole in the bottom (now the top) of the candle holder to feed the wiring through and hung it back up.


The Powder Room was next in line.
boring seashell-shaped-plastic-shade-over-mirror-sconce replaced with simple curly-que iron candleabra sconce:


Ya, um...  sorry for the crummy photography... so glad that you can also see the terribly crooked paint line and paint roller splotch on the ceiling!  Back to the fixture... This one was easy- Habitat ReStore- Period.  No rewiring- just purchase and hang.


Next to come down was the tiny white glass globe ceiling fixture in the Powder Room.  It was replaced with another DIY fixture. 


I found this decorative ball at Tuesday Morning.  It is about 12"- 14" across.  It is a very fine wire mesh welded together along the seams and to the iron discs at the top and bottom.  I used wire cutters to snip the iron disc off of the top.   I took the glass globe and its ceiling attachment/canopy-thing down and then spray painted the canopy the same flat black that I used for the entry fixture.  I reinstalled the canopy to the ceiling and added a light bulb,  I created a little rim along the edge of the wire mesh with some pliers and then attached it to the canopy with the screws that held the glass globe in place. 
Et Voila!

I am so happy to have made these little changes.  They just make me smile!