Wednesday, June 6, 2012

vintage wind chime

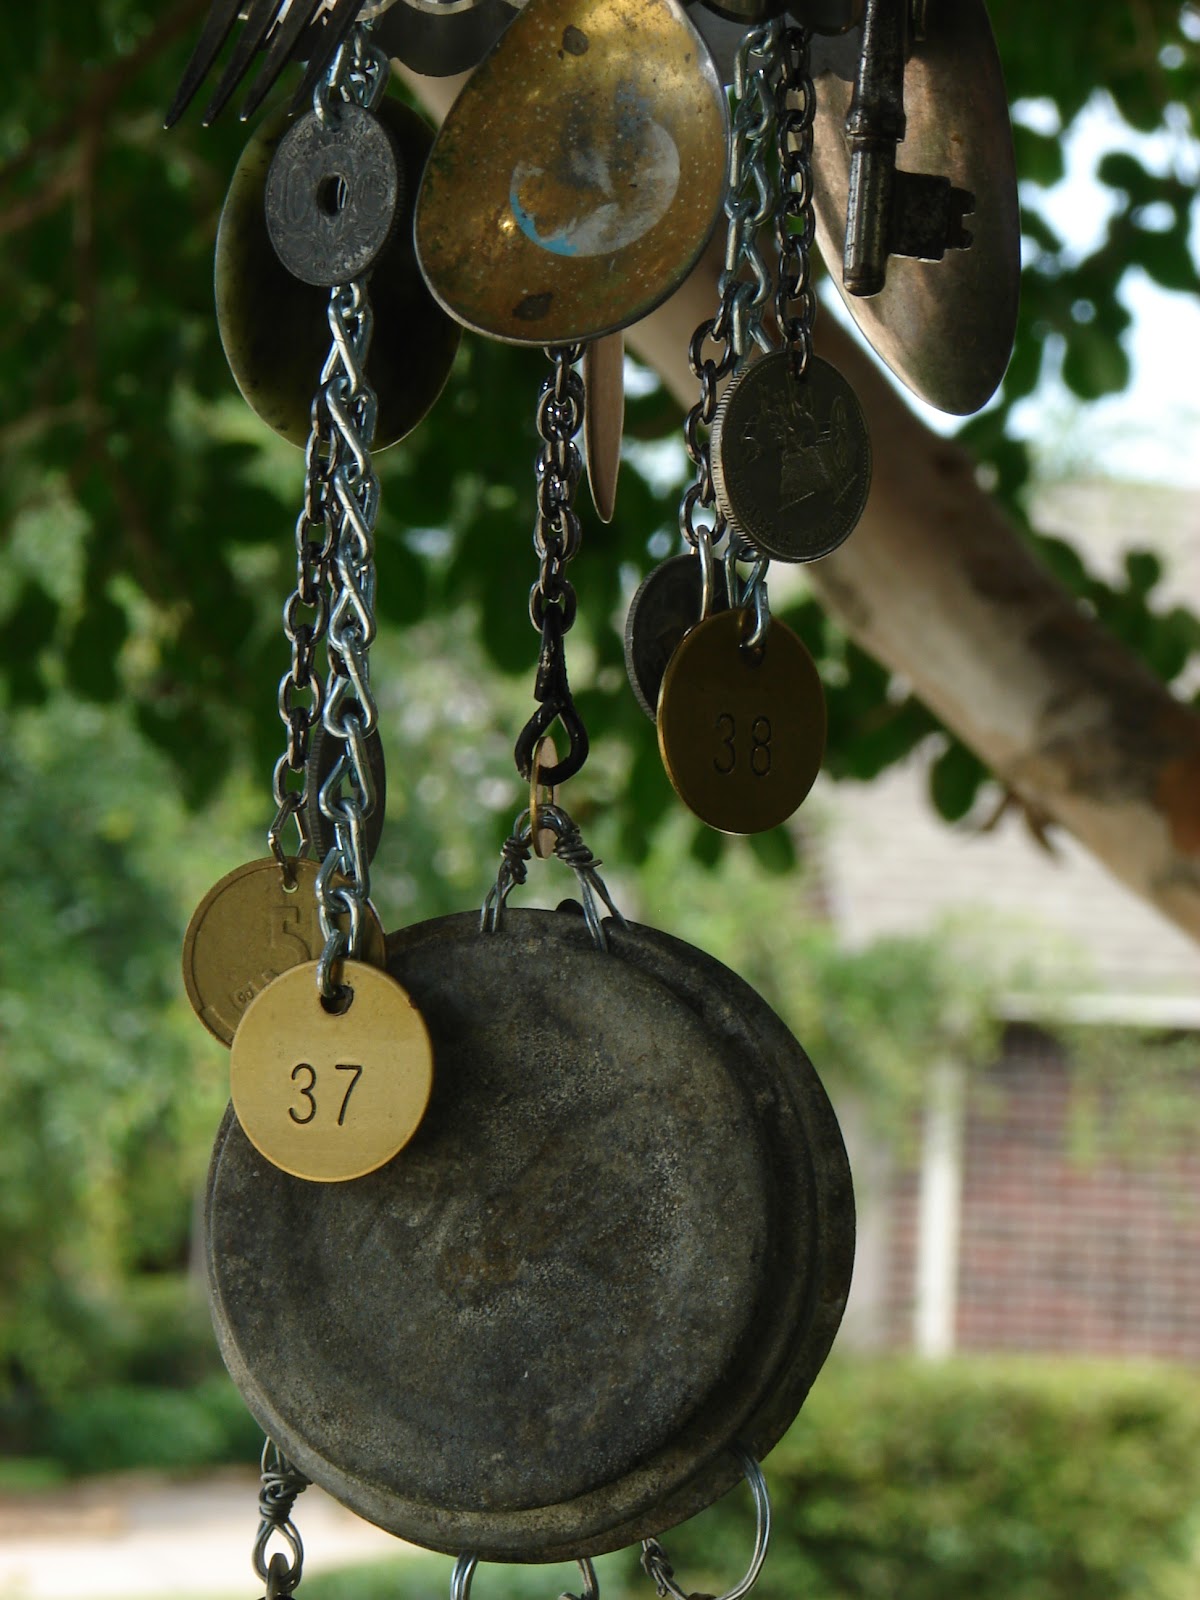
On my long list of things to make was a "vintage-find" wind chime.
My inspiration came from a couple of photos I saw on pinterest...
 
baby mobiles by Madeleine Boulesteix at Blogesteix


and...
Handmade windchime by Rebecca Sower
Handmade windchime, a photo by Rebecca Sower on Flickr.
I thought it might be an interesting "gift" for my husband for our upcoming anniversary.  So I moved it up in the queue of  "to-do"s. 
I know what you might be thinking, "a girly wind chime for your husband?"... It is sort of on the order of a husband giving a blender to his wife as an anniversary gift.  I wanted to make it though, therefore, I rationalized that it would be a "gift" for both of us to memorialize our 16th year of marriage.
The end product:

Anniversary Windchime DSC00150 by everdayartdesign
everyday art design's anniversary wind chime
I shopped at a couple of local second-hand and "antique" stores. 
What I found:
sliver plate baby cup
crystal chandelier prism
zinc "ball" canning lid
silver plate spoons, fork, butter knife
stainless biscuit cutter

I had purchased a few things off of ETSY earlier this year that- at the time I had no specific use for- I just knew I loved them and would use them eventually:
foreign coins
old keys

a few other items:
washers
nuts
several different chains (from a home improvment store and craft store)
floral wire
a drill bit that would drill through metal
a stone necklace pendant (on clearence a year ago at a craft store)
a blank brass disc
numbered brass discs (from an online office/shipping supply store)
wire cutters and a couple of needle-nose pliers
a Dremel electric engraver (I searched at several craft and home improvement stores looking for a tool that I could use to draw images or words on metal... It was hard to find... finally a clerk at Lowe's found one for me- even though he didn't think they carried such a thing.)

I so enjoyed the process of making the wind chime! 
shopping
laying out the design
drilling the holes
working the links
giving it
hanging it


the top silver cup

the biscuit cutter in the middle


the "ball" lid near the bottom
 
"16 years" added to the brass disc with the Dremel engraver at the very bottom


I hope to have many more happy years listening to its charms!

Monday, March 5, 2012

clouds

I saw a painting in a movie.
I was fascinated by it.
It was quite large and hung like a headboard over the main character's bed. 
7/8 of the painting was of clouds... with the last 1/8 being a vague green/brown field. 
It was so serene.  I thought it must be wonderful to wake up to those clouds everyday.
Then it occurred to me that I might be able to paint something like them that could inspire me everyday.

I bought the canvas-  months ago.  It is 4'x4'.
I studied the clouds even more than usual (I have always been in awe of God's ever-changing palette and sculptures in the sky).
It took me a while to get up the courage to start painting.  I wondered if I was going to be able to catch on the canvas what I saw in my mind.

Here is what I created...

"clouds" by Laura Gibbs
 I am pleased with it.
 
It is so hard to be objective as an artist... being so intimately involved with a work... having a vision of what "it" is supposed to look like, to convey...  Does it ellicit the same emotion in others as it does in me?
I imagine most artists deal with these thoughts and emotions.  Believe me when I say that I dont suppose to compare myself with the likes of Tchaikovsky, but I heard once that the Nutcracker was Tchaikovsky least favorite composition... yet it is beloved by the public - probably the most well know Ballet in the world.  What did he see (or should I say hear) in it that displeased him?  Which composition was HIS favorite- how do the masses respond to that one?
Art is subjective.  It can't be reduced to one word.  Can't be put in a box.  It affects us all differently.  I must deal with that.  

My "clouds" make me happy. 

Friday, February 17, 2012

floral inspiration

I find myself drawn to flowers (and butterflies- but I'll save those for another time, perhaps).
Flowers have always been a source of design inspiration.
They can be complex or simple, elegant or casual... anything... except ordinary.

everyday art design studio's 3 flower lapel pin

There is just something about them that feeds the soul.  
I would guess that God intended us to feel something when we look at flowers.  "For since the creation of the world God's invisible qualities- his eternal power and divine nature- have been clearly seen, being understood from what has been made, so that men are without excuse." Rom 1:20. 
Creation reveals God to us- intentionally.
What a joy it must have been to dream up all the colors, sizes, and shapes that make up the world of flora.

There are numerous tutorials out there for wrapped/twisted flowers- all similiar in their construction.  I don't feel the need to add mine to the masses.  Here is a tutorial I particularly like from Cherry Street Cottage.


Cherry Street Cottage- fabric rosette tutoral
 

a recent creation of mine:


everyday art design studio's wrapped flower lapel pin
 The fabrics for my flower pin:
pinky/orange- a cotton dyed batik
brown- a two tone printed diamond pattern cotton
green/blue- printed swirl cotton
orchid purple- synthetic tafetta

I added beads to the center of two of the flowers.
The leaf is created in the same fashion- just shaped like an oval to begin with instead of a circle.
I prefer sewing the flowers (as opposed to glueing).  It feels more permanent to me.
I stitched the flowers and leaf to a stiff felt on the back and added a locking pin back.


My youngest gave it to his Kindergarten teacher for Valentine's Day.

Have a blessed weekend!

Saturday, February 11, 2012

leave no stone unturned

crocheting around a smooth beach or river stone....
i made these:
everyday art design studio's crocheted stones
inspired by these:

Margret Oomen's crocheted stones featured on Purl Bee
These beautifully wrapped stones were designed by Margret Oomen and called "Little Urchin crochet covered sea stones".  They are featured on Purl Bee's website.  Margret generously supplied the crochet pattern for this design:
Margret Oomen's crocheted stone pattern featured on Purl Bee
 
Margret's Blog: resurrection fern
Margret's ETSY shop: knitalatte : resurrection fern
Thank you Margret for sharing your creativity with the world!

I crocheted the white stone (on the left above and on the right below) following Margret's pattern...  except that I continued the crochet around the whole stone (just continuing with "dc in every second stitch pulling tightly to make the cover very snug on the stone" from Margret's pattern: step 9).
the back of my white stone
I used Aunt Lydia's Bamboo Crochet Thread in White for the white stone. 
For the cream stone, I used a DMC crochet thread in Ecru.  For this stone, I started with a pattern for a heart.  From there, I improvised with different sets of stitches around the heart to fill in the rest of the front of the stone.  The back is completed in the same way as the white stone: dc in every second stitch until the spiral closes.

Tuesday, February 7, 2012

a new experiment

I am always up for a creative challenge.
Actually, I suppose I would say I thrive on them.

I read a shop owner's profile on ETSY the other day.  She is a crocheter who says that she only works without a pattern.
Innteresssting! 
Challenge On.

I think I probably know enough about crochet to work without a pattern... I think.
So here is where the experiment comes in.
What to create?
I am thinking... a cowl... a simple circle with lots of potential for... experimentation.
So here is the work-in-progress:
I started with a slubby cotton yarn (merlot colored).  Worked a few rows in a single crochet, double crochet repeat. 
I continued the sc,dc repeat with a double strand of a wool yarn (lavendar colored). 
Then completed the circle by joining the wool to the other end of the cotton yarn.

Ok.  Nice.  Lovin' the colors and the texture (thanks to the sc,dc repeat).
Time for a little embellishment.
I thought: trim.
Scallop.
I had a remnant of a ball of Noro sock yarn (sssooo love the long color gradients in Noro yarns) that is in the same color family as the first two yarns I used...  


Scallop started.

Now where?
The experiment continues....
I'll let you know...

Tuesday, November 8, 2011

today

today's project:  bias knit scarf
I was inspired by a scarf that I saw at a local yarn store.  It was long and skinny with diagonal stripes of different art/novelty yarns in MANY shades of pink.  It was capped off with 1" wide silk ribbon (in ombre pink/white) streamers as fringe.  It was fabulous! 
SO, I went searching on the internet for a pattern or directions on how to knit on the bias (diagonally).  Ravelry.com is a glorious source for patterns of all kinds- I can usually find what I am looking for there.
Although, this time, not so much.  I did not find exactly what I was looking for.  I wanted my "scarf" to be wider that what you would normally think of a "scarf" being... almost a "shawl"- but not a triangle... maybe a "wrap"- but not old-lady-looking...  so I took bits and pieces of other patterns and experimented.
LOVE EXPERIMENTING!!!!... the process of creating is such a joy! It took some tweaking... the first try was not what I wanted.  I adjusted.  And, LOVE the end product!
12 or so, yummy, quality yarns in shades of colors and a variety of textures.  Wool, Cotton, Acrylic.
I am working on an orange/brown/blue/ Autumn Leaves color scheme one right now (the collection of yarns at the top of this post).  You can see a couple of other color groupings here.
 It seems to me it needs a special style name.  "Joseph's Amazing Technicolor Dream Scarf" or something of the like.  Help me name it, will you? Post some suggestions.
Happy Knitting!

Sunday, November 6, 2011

yippee, quilt show!

I had a ball today at the International Quilt Festival in Houston!!!


So much inspiration!


Some new items on my list to do:
paint flowers on fabric with my new fabric paints then quilt it
make a scarf with felted wool beads at the end
make an art quilt with new hand dyed silk ribbons and embroidery cotton thread
practice machine quilting... got a new table for my sewing machine
use my new "do-dad" to "braid" silk ribbon into a necklace

So, off to play.